If you have a very specific object which isn’t a flat surface, you will probably have issues with finding a well suited suction cup. Instead of searching endlessly you should make them yourself.
First of all, some things you have to know before you start:
• Make sure you make as small 3D-testprints as possible. It will save a lot of time, because you will have to make some adjustments in the first versions of your suction cup. If you are 100% sure the design works you can figure out how to connect the suction cup to the end-effector.
• Don’t be afraid to make many test prints, it’s after all, R&D what you’re doing.
• Using PLA for the suction cups works perfectly fine, so you don’t have to use a fancy rubber (TPU/TPE) printer.
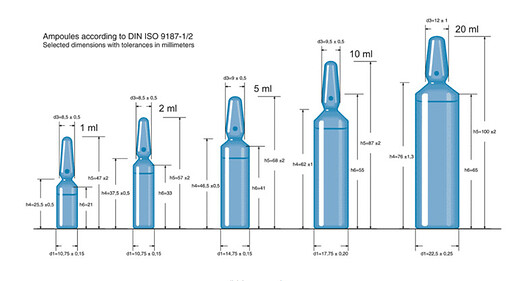
For explaining the steps we will use our example. We had to pick up ampoules at the tip.
-
Measure all the important dimensions. For some objects there are standardized dimensions available. You can easily find them, just search ISO/NEN/DIN [Name of your object]. We used the syntax: “DIN Ampoules”.
-
Try to make the area where the suction cup connects to the object as big as possible while maintaining a good seal, the bigger the area the stronger the lifting force will be. (p = F/A F = p*A).
-
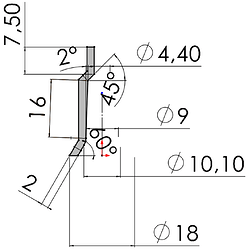
Make sure there is a chamfer added to your suction cup to make sure you can get a good seal for the full range of your tolerance. In our case 2° was sufficient. For details look at the picture below.
If you want to discuss this topic or if you have questions, reply in the comments.

